New: Build a Rich Menu That Fits Your Business in 5 Minutes, No Image Editor Needed
15/09/2026 • 6 min read
Why this tool exists
The Rich Menu is the button panel under a LINE OA chat and the main way customers tap “Book”. Building one by hand means designing a 2500×1686 or 2500×843 image, aligning tappable areas to it, and wiring each link in LINE OA Manager.
Most shops stall right there: they have a LINE OA and a booking system, but customers still type “how do I book?”.
The new Rich Menu page in the Portal does it in one screen: choose a business type, get buttons, icons, labels and colors from a master template, tweak anything, and publish to LINE without uploading an image yourself.
What the system does for you
12 business templates: salon, nail, clinic, restaurant, buffet, fitness, meeting room, auto repair, mobile repair, field service, government office, and consulting. Each ships with the buttons that business actually uses.
5 layouts: hero + 3, 6 cells, 4 cells, 3 cells (half height) and 2 cells (half height). Switching layouts refits your existing buttons automatically.
Each cell can open the booking LIFF, open the member/queue page, open an external link (e.g. Google Maps), or send a chat message (e.g. “Contact us”).
The image is rendered at the exact size LINE requires, converted to JPEG if it exceeds 1 MB, and the tappable areas are derived from the same cell data as the picture, so taps never land on the wrong button.
Preview on a simulated phone before publishing, or download the PNG if you prefer to upload it through LINE OA Manager yourself.
Example: a fitness studio that wants just 2 buttons
Say “Strong Fit Studio” runs yoga and weight-training classes. They want customers to book a class in one tap plus a contact button, and nothing else.
Step 1 Your business: the system pre-selects “Fitness / classes” from the registration data. The fitness template arrives as 6 cells (Book class, Member, Schedule, Promotions, Map, Contact).
Step 2 Layout: pick “2 cells (half height)”, 2500×843. The first two buttons, “Book class” and “Member”, are kept. A half-height menu leaves more room for chat, good for studios whose customers message often.
Step 3 Style and color: choose Bold and enter the brand color, e.g. #202939 (deep navy), or pick from the suggested swatches.
Step 4 Buttons and links: keep cell 1 as “Book class” with the dumbbell icon and action “Open booking LIFF”. Change cell 2 to “Contact trainer”, chat icon, action “Send message to shop” with the text “Contact trainer”. When a customer taps it, the message lands in your Chat Inbox immediately.
Step 5 Save and publish: press “Save settings”, then “Save image”, then “Publish to LINE”. The system asks once for confirmation, and within seconds every follower sees the new menu.
What you need before publishing
A Channel Access Token for the LINE OA saved under LINE Settings. Without it the publish button explains what is missing, but you can still download the image.
The booking LIFF ID saved under LINE Settings. Both the bare ID and a full https://liff.line.me/... link pasted from the LINE console are accepted.
No separate member LIFF yet? The “Member” button opens the booking LIFF on its “My queue” tab automatically.
The order is Save settings → Save image → Publish. With unsaved edits the publish button stays disabled and tells you why.
Good to know
Menus published through the system do not appear in LINE OA Manager’s Rich Menu page because they are created via the API. The Portal shows the menu id, publish date, and an “Unpublish” button instead.
Republish as often as you like. The previous menu created by the system is replaced automatically; customers do nothing.
If you set a Rich Menu in LINE OA Manager earlier, the system menu becomes the default instead. Disable the old one there to avoid confusion.
Shops that published before 15 September 2026 should republish once to receive the new booking-button link format that identifies the shop explicitly.
Summary
The Rich Menu is the front door of your LINE OA. When customers see “Book” the moment they open the chat, repetitive questions drop immediately.
Open Rich Menu in the Portal, pick your business type and cell count, and publish. It takes under 5 minutes; message the team on LINE if anything gets stuck.
Attachments and setup screenshots
Compare your LINE console values with these examples before verifying and publishing.
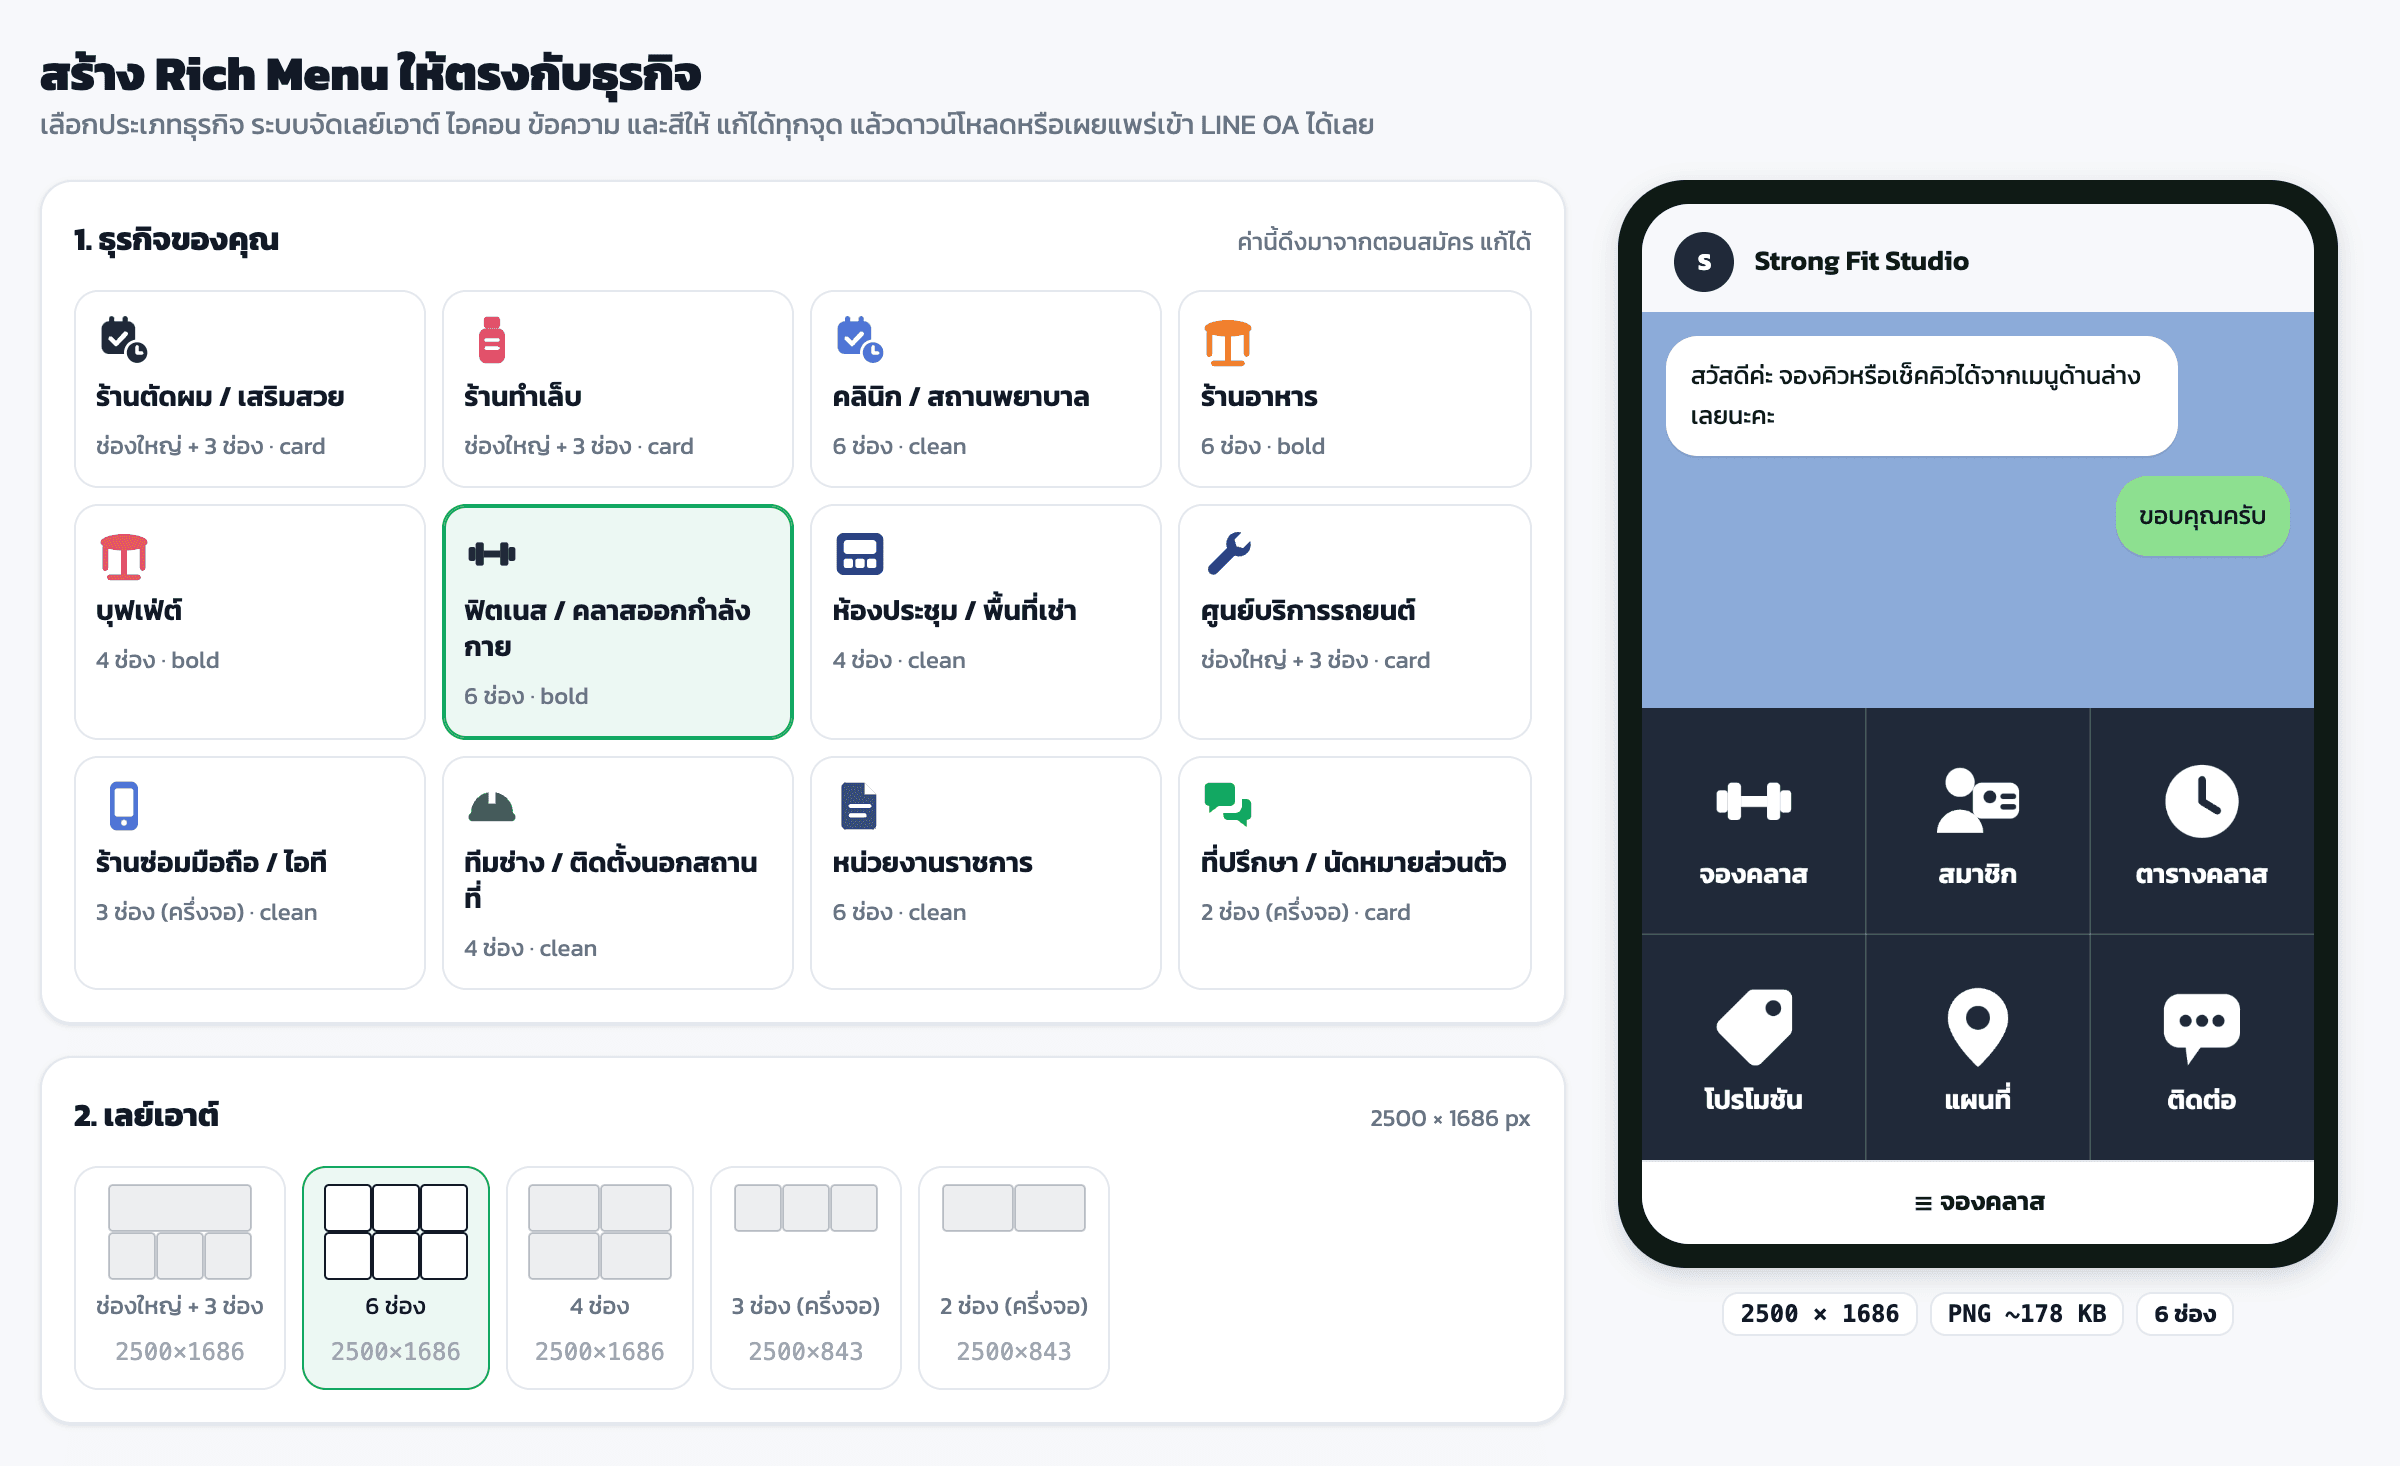
The Rich Menu page on first open. Steps 1-5 run down the left; the phone preview on the right redraws on every change. “Fitness / classes” is pre-selected from registration data, so the 6-cell template loads first.
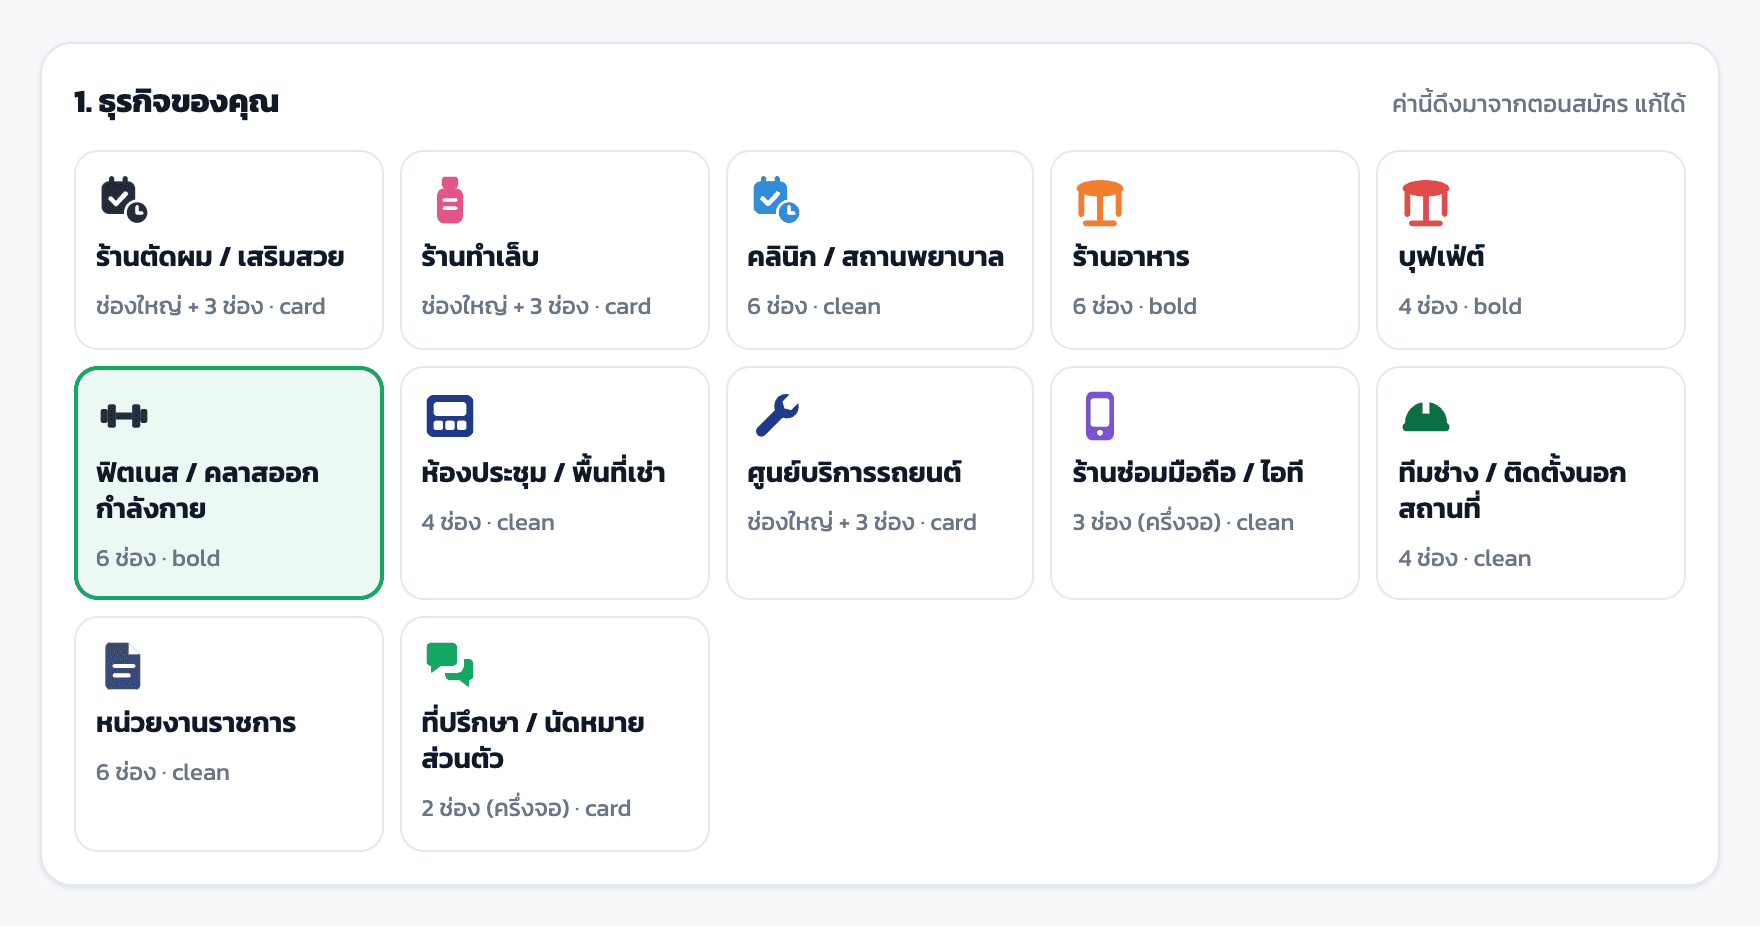
Step 1 Your business: 12 templates. Each card shows its default layout and style under the name. Switch any time; with unsaved edits the system asks before replacing them.
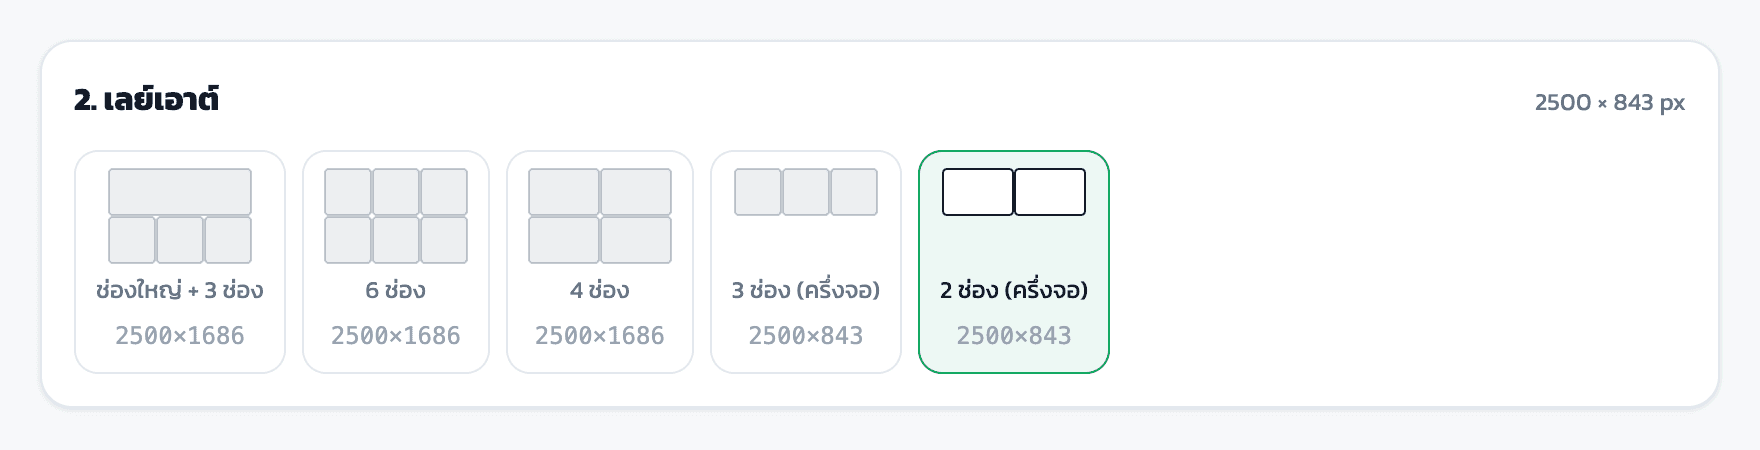
Step 2 Layout: pick “2 cells (half height)”. The first two template buttons (Book class, Member) are kept and the image size switches to 2500 × 843 automatically.
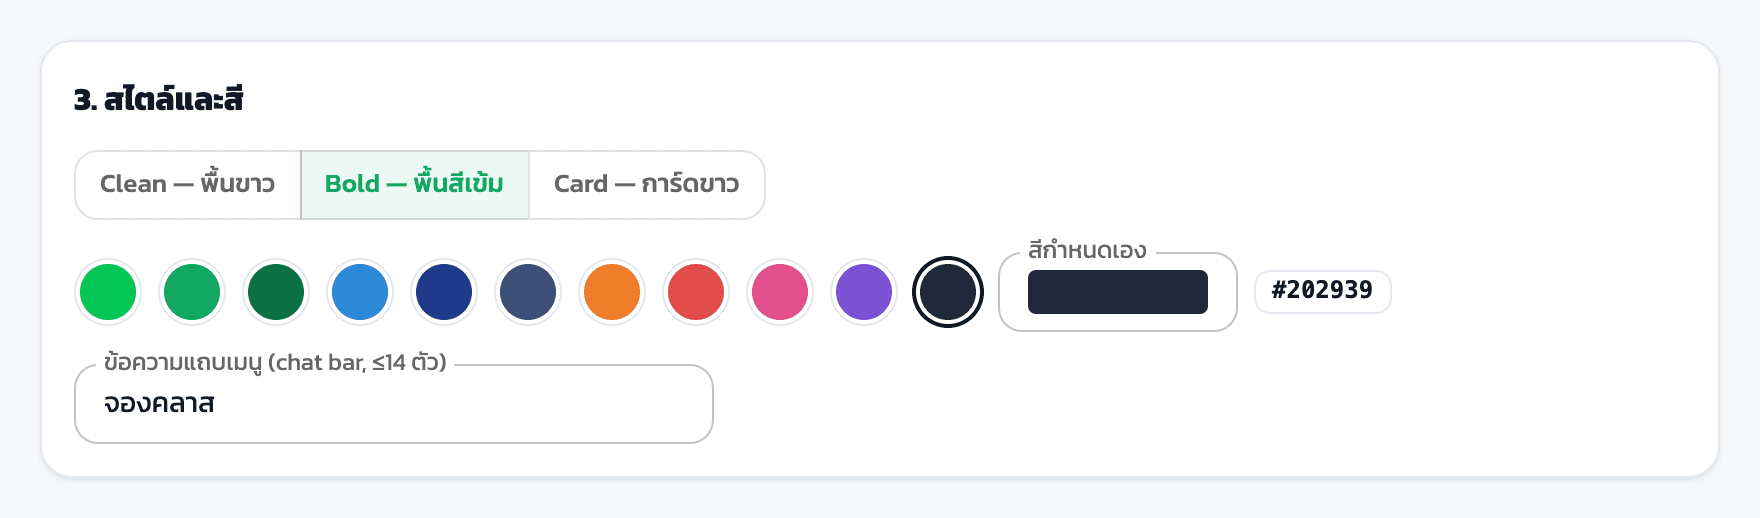
Step 3 Style and color: Bold fills the whole menu with the brand color. Pick a suggested swatch or enter your own; this example uses #202939. The chat bar text is the label customers see on the menu toggle in chat.
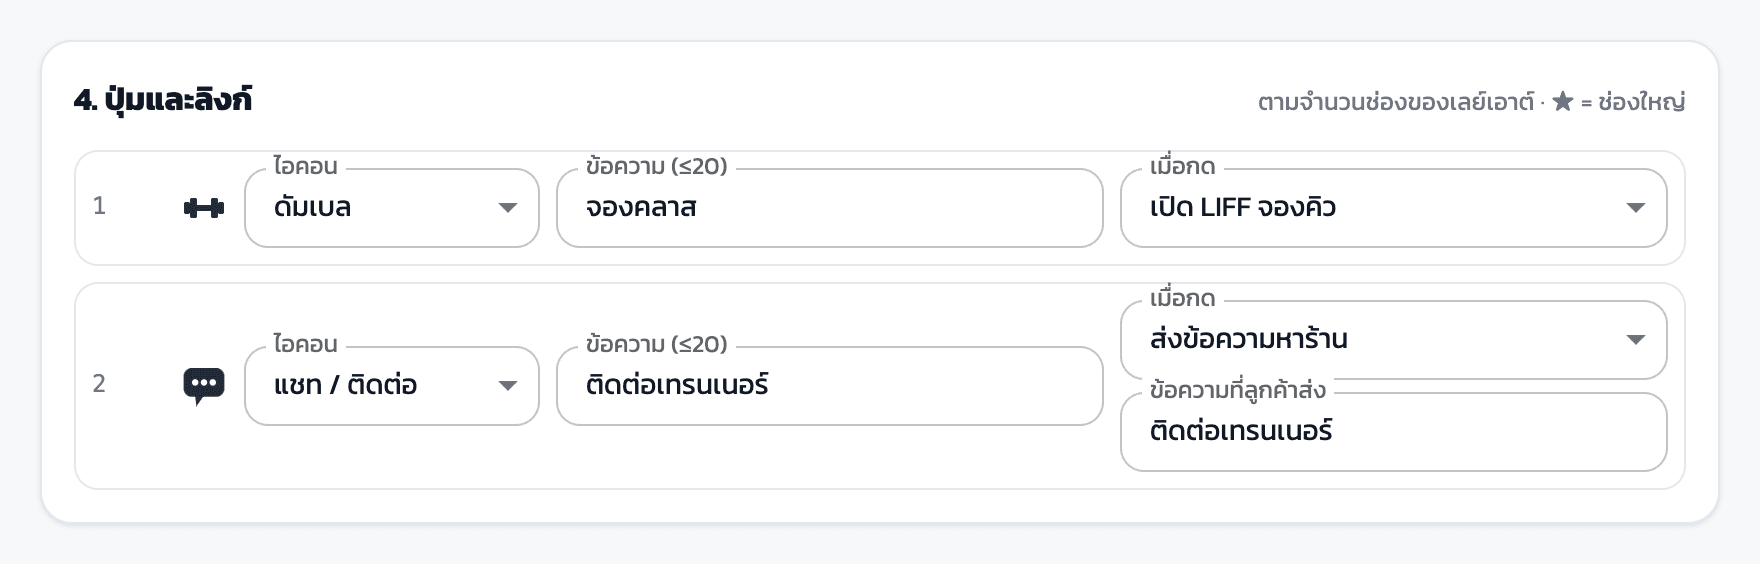
Step 4 Buttons and links: cell 1 stays “Book class” opening the booking LIFF. Cell 2 becomes “Contact trainer” with the chat icon and “Send message to shop”, so the tap lands in your Chat Inbox immediately.
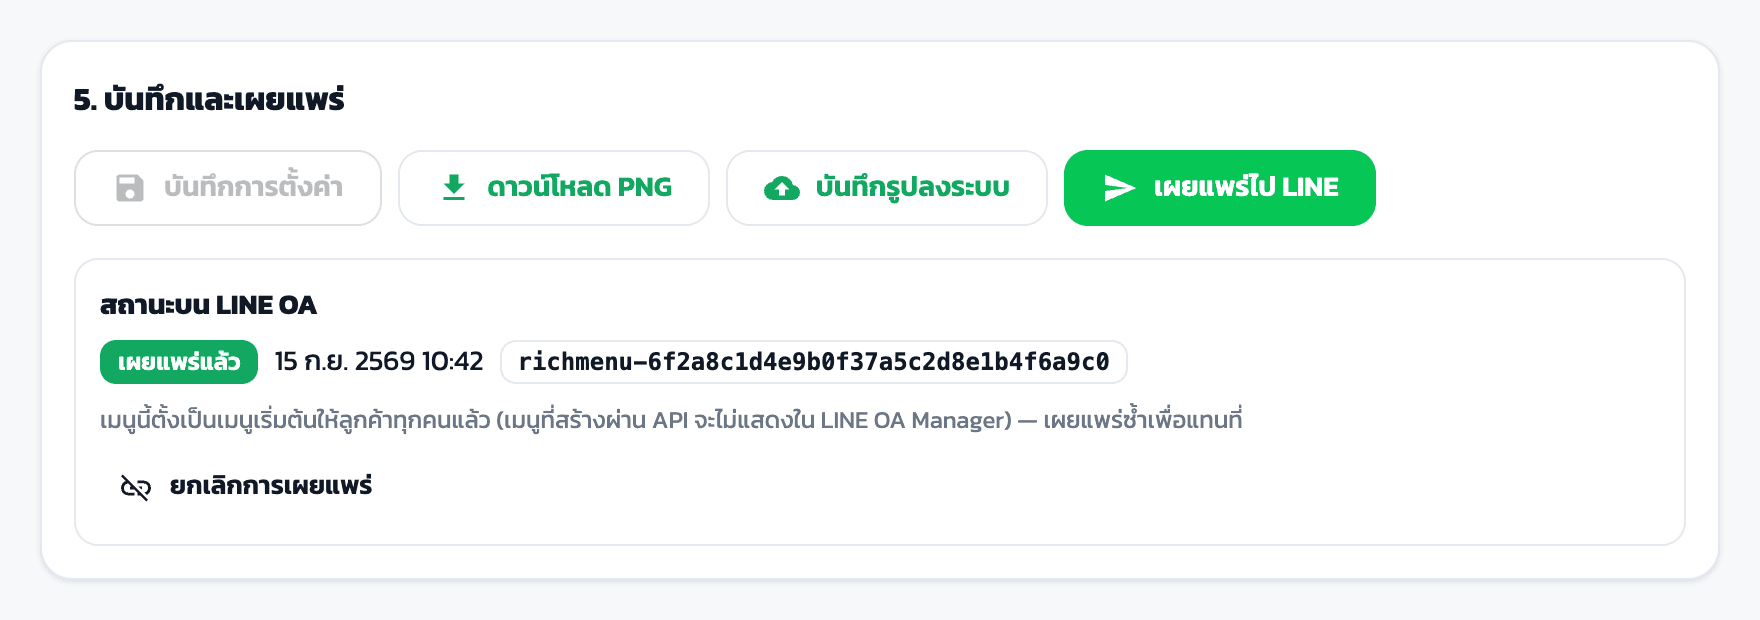
Step 5 Save and publish: the order is Save settings → Save image → Publish to LINE. After publishing, the status box shows the menu id, the publish time, and an Unpublish button.
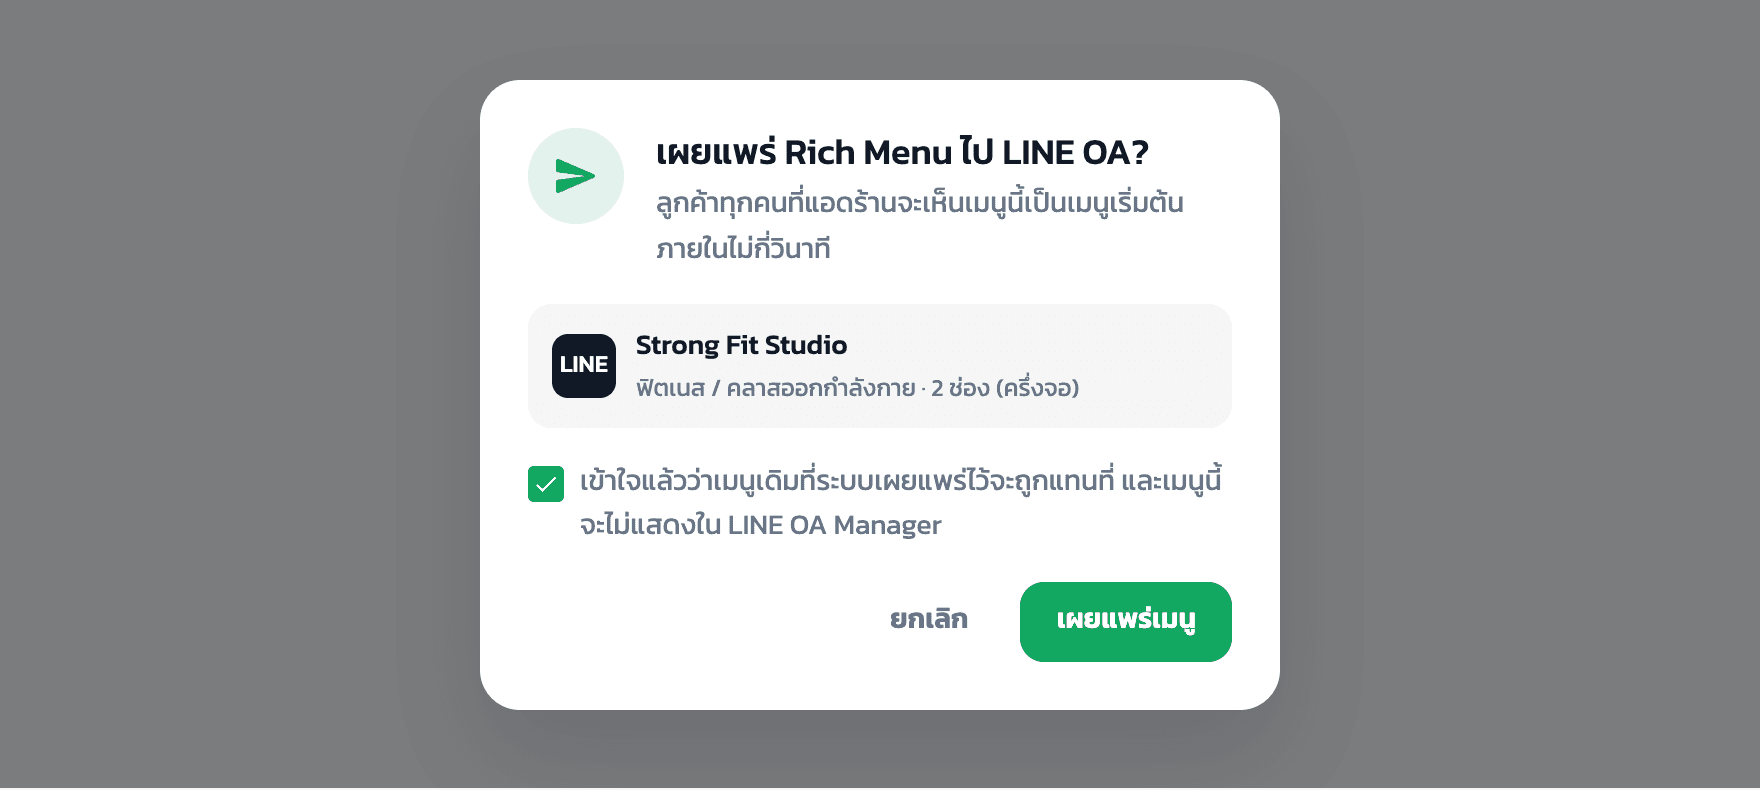
The confirmation before publishing: asked once, with a checkbox acknowledging that the previous system menu is replaced and that this menu will not appear in LINE OA Manager.
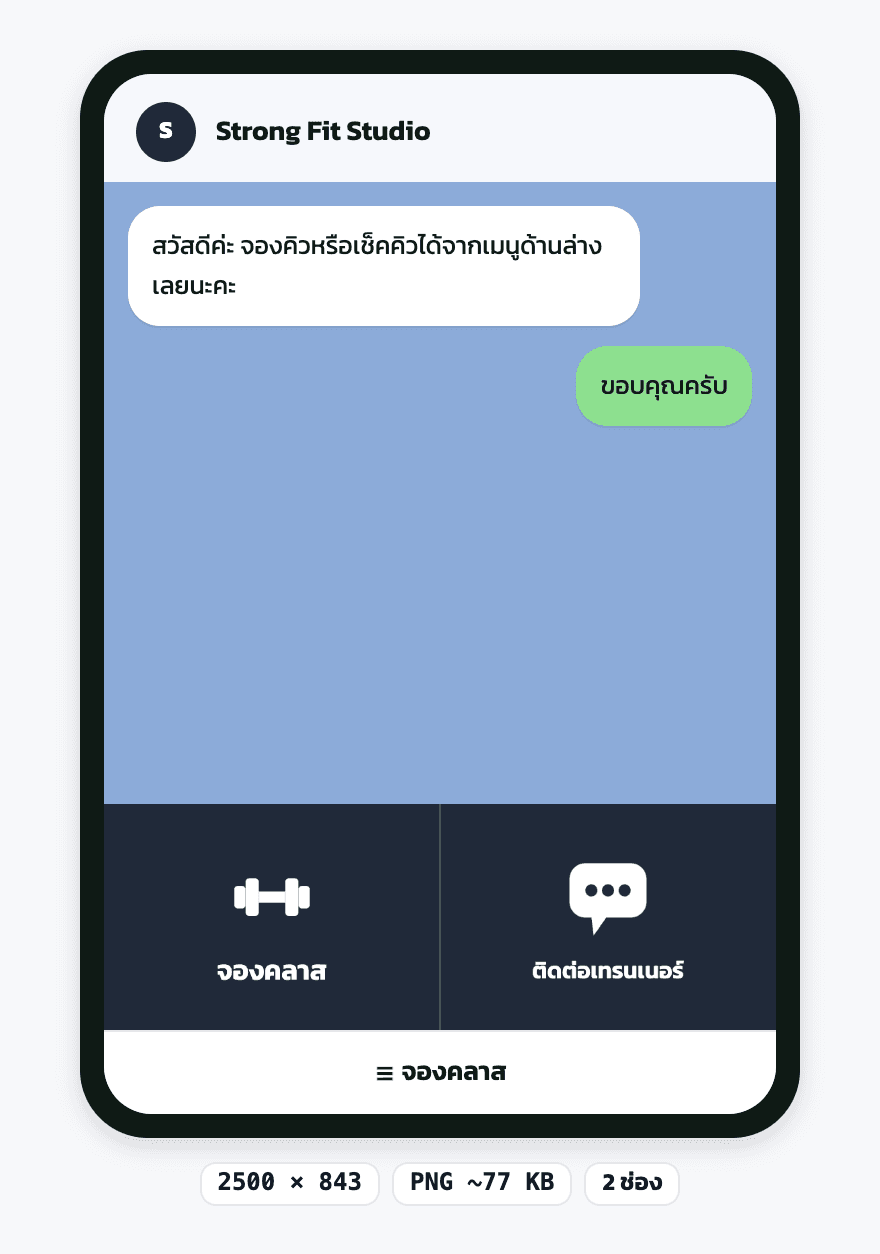
Phone preview for Strong Fit Studio, drawn by the same renderer that produces the file sent to LINE. The chips show the image size, approximate PNG size, and cell count; anything over 1 MB is saved as JPEG.
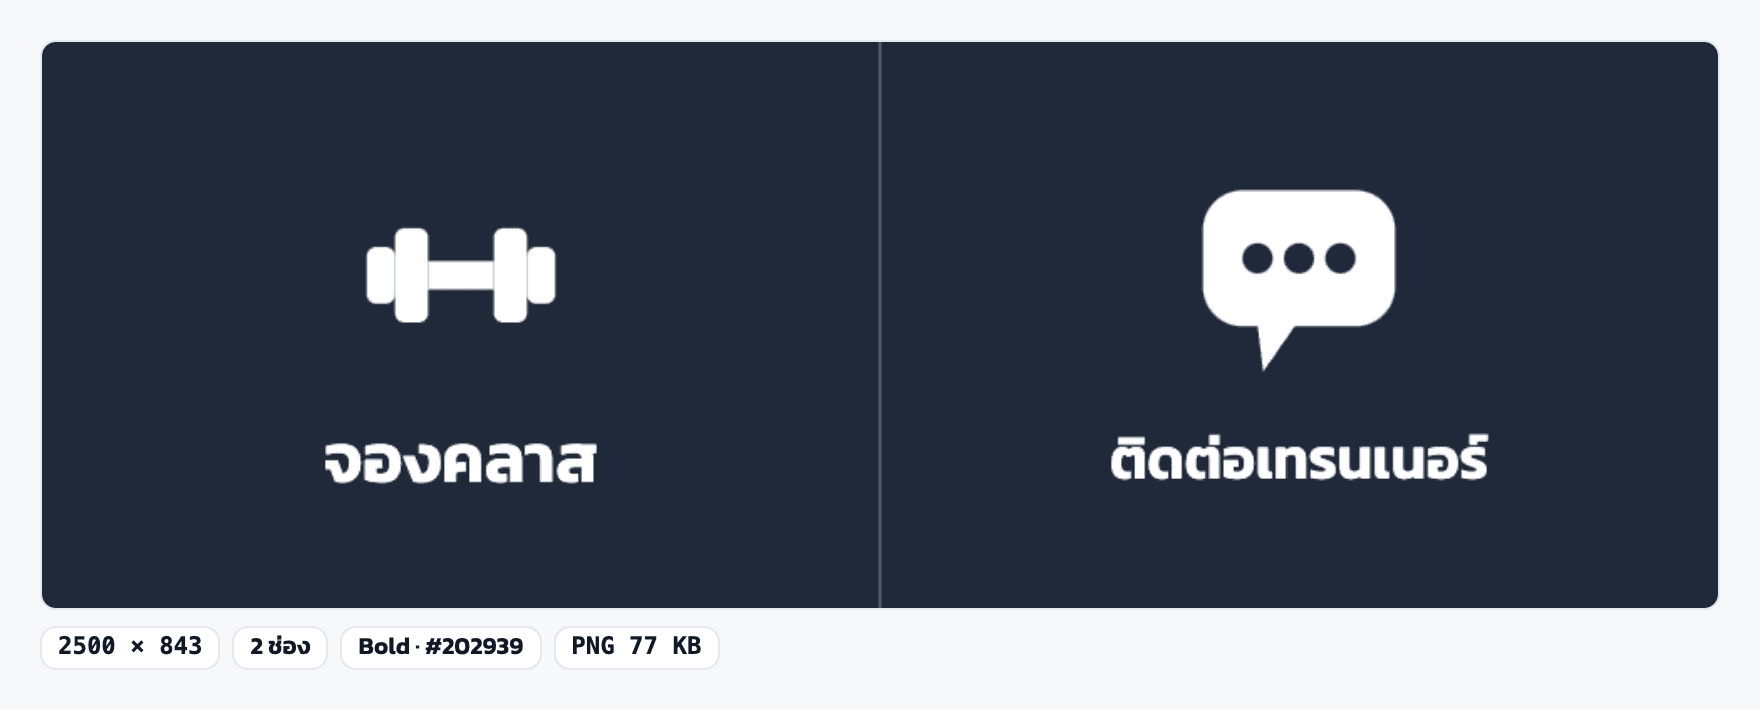
The menu image the system generates and sends to LINE (2500 × 843). Button positions in the picture and the tappable areas sent to LINE come from the same cell data. You can also download this file and upload it in LINE OA Manager yourself.